
Setting up an interactive Twilio text respondent source
Interactive text surveys run surveys over text message in a back-and-forth between the user and the interview:
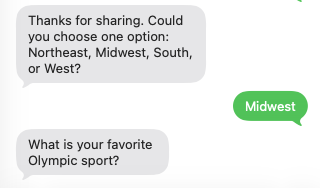
Use Twilio Text to upload phone contacts and send survey questions over SMS.
Before you start
Advanced audiences must be enabled in your account.
You need a Twilio Account SID, Auth Token, and either:
a Twilio phone number, or
a Twilio Messaging Service SID.
Your contact numbers must be in E.164 format (example:
+15551234567).
Step 1: Create a new Twilio Text source
Go to Sources and create a source with type Twilio Text.
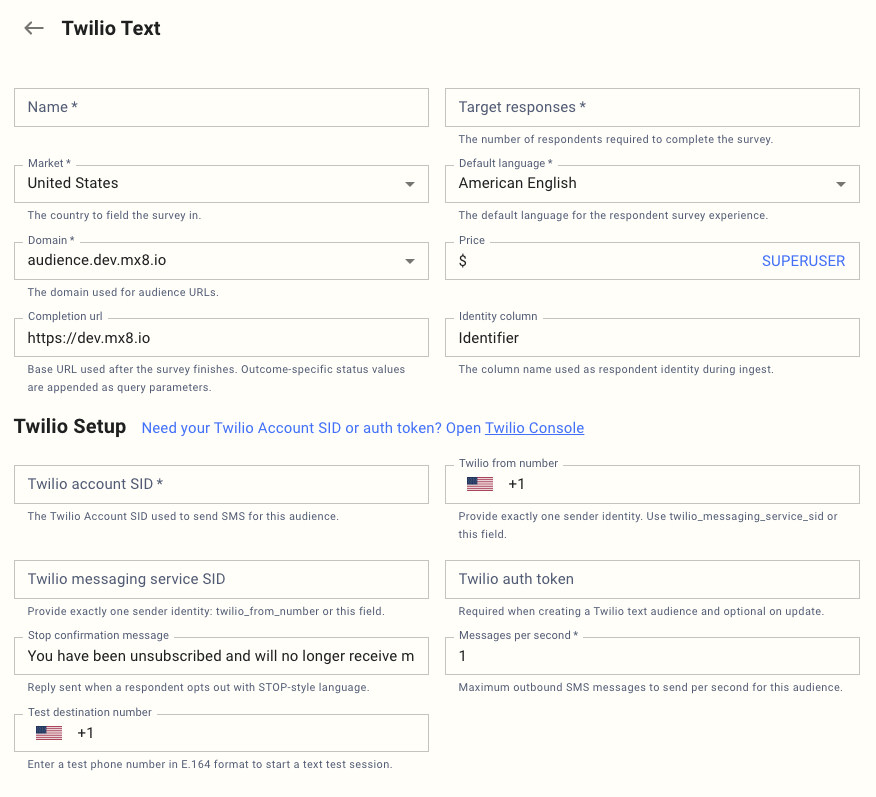
Fill these Twilio-specific fields together with the selected base fields:
Field (UX label) | What to enter | Required |
Twilio account SID | Your Twilio Account SID used to send SMS | Yes |
Twilio from number | SMS-enabled Twilio number in E.164 | Exactly one of this or Messaging Service SID |
Twilio messaging service SID | Twilio Messaging Service SID | Exactly one of this or From number |
Twilio auth token | Twilio Auth Token | Required on create, optional on update |
Stop confirmation message | Auto-reply sent after STOP/unsubscribe | Optional |
Messages per second | Outbound SMS rate limit for this source | Yes (min 1) |
Completion url | Redirect base URL after survey completion | Optional |
Identity column | Contact file identity column name (default: Identifier) | Optional |
Step 3: Configure Twilio webhook
In the source, copy the Inbound webhook URL from the Twilio setup panel.
In Twilio Console, paste that URL as your inbound webhook for the sender (number or messaging service).
Save changes in Twilio.
Step 4: Upload contacts

Use Upload contacts file.
Supported file types:
.csv,.csv.gz,.xlsx.Include the configured Identity column (default
Identifier) and populate it with E.164 phone numbers.
Step 5: Send a safe test
1. Enter a value in Test destination number (E.164).
2. Save/update the source.
3. Confirm the test number is not already in your real contact list.
Step 6: Go live
1. Use the Status action Go Live.
2. Use Pause, Restart, or Complete as needed during fielding.